You’ve got a pile of old t-shirts you never wear? Instead of letting them sit there, why don’t you spare some time to turn them into something fresh and stylish? All you need is a pair of scissors and a few quick cuts to give your tees a whole new look. In this guide, I’ll show you how to cut a T-shirt into five cool DIY styles—super easy, no sewing, and only takes five minutes!
Materials Needed For Cutting Your T-Shirt
Before you start cutting, make sure you have these basic tools:
- Sharp fabric scissors: Regular scissors might not cut smoothly, so get a sharp pair.
- Chalk or fabric marker: This helps you mark where to cut before making the first snip.
- A ruler: Keep your lines straight and even.
- A flat surface: Lay your t-shirt out flat so you can cut cleanly without mistakes.
Actually, a pair of scissors is all you really need. But if you’re a beginner and not used to DIY fashion, it’s best to have all the right tools ready!
How to Cut A T-Shirt: 5 DIY Styles Only Take You 5 Mins
Now that you have your tools ready, let’s roll up your sleeves and get to work. There are many styles to try, but check them all out to see which one suits you best. I have to say, don’t be surprised!
And another thing, be careful, make sure there are no grease stains on your shirt, don’t let your DIY shirt lose its beauty.
DIY Style 1. Off-the-Shoulder Cut
Get that effortless, slouchy off-the-shoulder look in just a few steps! This guide is for a one-shoulder look. If it feels a bit too “bold” for you, just cut the other side to make it even!
How to do it:
- Lay your t-shirt flat on a smooth surface (just to avoid uneven cuts).
- Mark a semicircle around the collar about an inch from the seam using chalk or a fabric marker.
- Cut along the marked line carefully to remove the collar.
- Try it on and check the fit. If you want a wider neckline, trim a little more.
It’s not that difficult, however, you should be decisive in each cut to avoid uneven cuts.

Off-the-shoulder Cut
DIY Style 2. Fringe Hem
Want to give your t-shirt a fun, boho vibe? Adding a fringe hem is an easy way to make it trendy and unique!
How to do it:
- Lay your t-shirt flat on a table or any smooth surface.
- Decide how long you want the fringe and use chalk or a fabric marker to draw a guideline across the shirt.
- Cut vertical strips from the bottom hem up to the marked line, keeping each strip about half an inch
- Stretch each strip slightly to make the fabric curl and give it a more natural look.
- (Optional) Tie small knots at the top of each strip for extra detail.
And here’s how to cut a T-shirt in style you should know.

Fringe Hem style
DIY Style 3. Side Slits
If you want a looser, more relaxed fit, we’ve got you covered. Adding side slits to your t-shirt is a quick and easy way to make it comfier and more stylish! Or if you want an even bolder style, go for back slits, you’ll be amazed with the result!
How to do it:
- Lay your t-shirt flat on a table to keep the fabric even.
- Decide how high you want the slits and mark the spots on both sides with chalk or a fabric marker.
- Cut straight lines upward from the hem to the marked points.
- Try it on and check the fit. If you want a more dramatic look, extend the slits a little higher.

Side slits (or back slits)
DIY Styles 4. Lace-Up Front
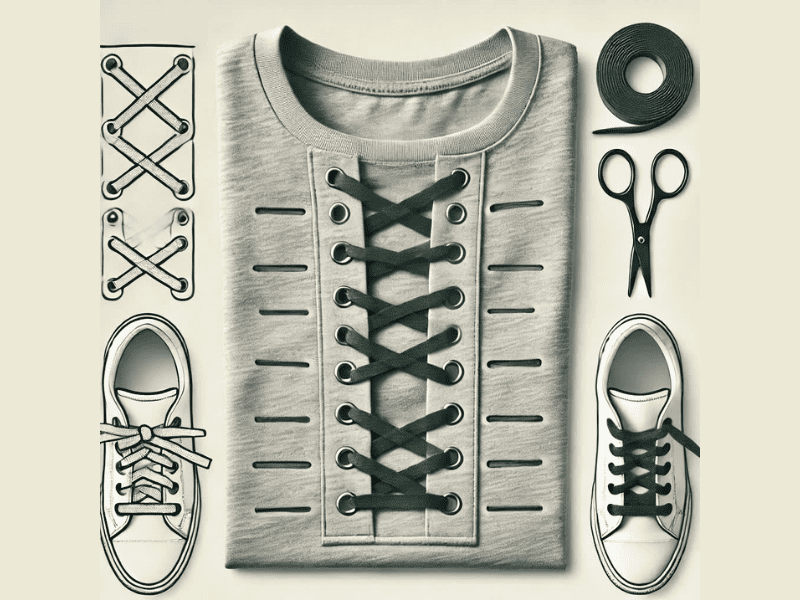
“I have a lot of unused shoelaces, are there any creative ways to use them on a shirt? Also, how to cut a t-shirt to make it work with laces” No worries, we’ve got you.
Lace-up front is a way to turn your plain t-shirt into something stylish and unique. The braided design on the back adds a cool, customized look without much effort. This style requires shoelace, ribbon, or fabric strip. Hole punch is okay but not compulsory.
How to do it:
- Lay your t-shirt flat and decide where you want the lace-up detail—usually down the center or slightly off to one side.
- Use chalk or a fabric marker to draw two parallel lines about an inch apart. This will be your lace-up section.
- Cut small, evenly spaced slits along both lines. Keep them about half an inch apart for a clean look.
- Weave a shoelace, ribbon, or fabric strip through the slits, crisscrossing like a sneaker lace.
- Adjust and tie the ends to secure the look. You can leave them hanging loose for a relaxed vibe or tie a bow for a polished finish.

Lace-up front style
DIY Style 5. From T to Sleeveless
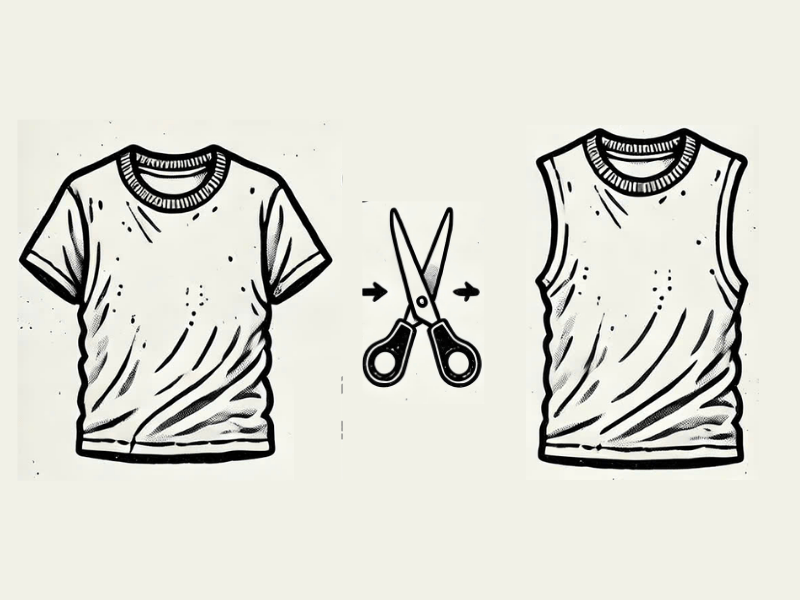
Got an old t-shirt lying around? Why not turn it into a sleeveless one suitable for your workouts? Don’t worry, there is no sewing, no hassle, just need to know how to cut a T-shirt—just one simple cut, and you’ve got a brand-new look (but it may take a bit longer).
How to do it:
- Lay your shirt flat to make sure it’s smooth so you get even cuts.
- Cut off the sleeves, remember to follow the seam or go a little wider for a muscle tee look.
- Adjust the neckline. This one is optional but just consider, cut a deeper scoop or V-shape for a stylish touch.
- Give the edges a little tug to make them curl naturally.
And that’s it! You’ve got a fresh sleeveless shirt perfect for workouts, summer days, or layering. This one is not only stylish but also makes folding your shirt much easier.

“From T to sleeveless” style
5 Precautionary Tips You Should Notice When Cutting Your T-shirt
Before you start cutting, here are a few things to keep in mind to make sure your DIY t-shirt turns out just the way you want:
- Practice first: If you’re new to cutting t-shirts, grab an old one to test your cuts. This way, you can get a feel for the scissors and see how the fabric behaves before working on a shirt you actually love.
- Wash and iron: Freshly washed and ironed shirts are easier to cut. Wrinkles can mess up your lines, and dirty fabric might not stretch or curl properly after cutting. Trust me, you don’t want that to happen.
- Start small: It’s always better to cut less at first! You can always trim more later, but once it’s cut, there’s no going back. If you’re unsure, make tiny cuts and check the look as you go.
- Use sharp scissors: Like I did say earlier, dull scissors will make jagged, messy edges. A good pair of sharp fabric scissors will give you clean, smooth cuts.
- Measure and mark: If you want an even, symmetrical look, use chalk or a fabric marker to mark your cutting lines before you start.
A little prep goes a long way in making your t-shirt look neat, stylish, and professional! You definitely don’t want to mess up with your favorite T-shirt.
FAQs
1. Can I Cut a T-shirt Without Fraying?
Yes! Most t-shirts are made of knit fabric, which doesn’t fray like woven fabrics. However, if you want a cleaner look, you can hem the edges or use fabric glue to seal them.
2. What Type of T-shirts Work Best for DIY Cutting?
T-shirts made of 100% cotton or cotton blends work best since they hold their shape well. Avoid super-thin or stretchy materials, as they might not cut evenly.
3. How Do I Make Sure Both Sides Are Even When Cutting?
It is simple, just fold your t-shirt in half before marking and cutting. This ensures symmetry, especially for styles like the off-the-shoulder cut or side slits.
Final Word
See? You don’t need a bunch of tools or complicated steps to master how to cut a t-shirt. Hopefully, this guide helps you refresh your old wardrobe and give your clothes a new life!


