Are you curious about how to turn t shirt into tank top? You’re in the right place. Yes T-Shirt will show you how simple it is to make classic and sporty tank tops at home with an old t-shirt and some basic materials.
Turning T Shirt Into Tank Top: 2 Easy Methods You Can Do At Home
If you are a beginner, then you have nothing to worry about! We’ll walk you through 2 simple methods you can do right at home with just a few basic supplies.
Method 1: The Simple Cut
All You Will Need
The beauty of this method is in its simplicity. To transform your t-shirt into a tank top, you will need:
- An old t-shirt (preferably one size larger than you typically wear)
- Sharp scissors
- Chalk or washable marker (Optional)
- A ruler (optional)
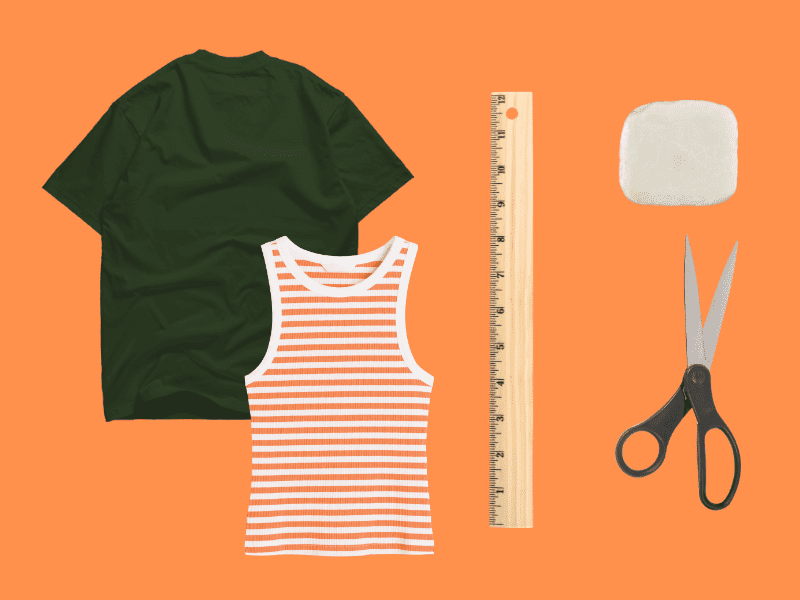
This is everything you need for this method.
First, we will start with the classic, unisex tank top. This simple method works for everyone.
Step 1: Prep Your Workspace
You should find a clean, flat surface to comfortably lay out your t-shirt. Ensure it is free of wrinkles or bumps that could make your cutting uneven.
Step 2: Fold Your T-Shirt
Fold your t-shirt in half lengthwise, bringing the sleeves together. This is called a “hot dog” fold. Smooth out any wrinkles to ensure a neat look.
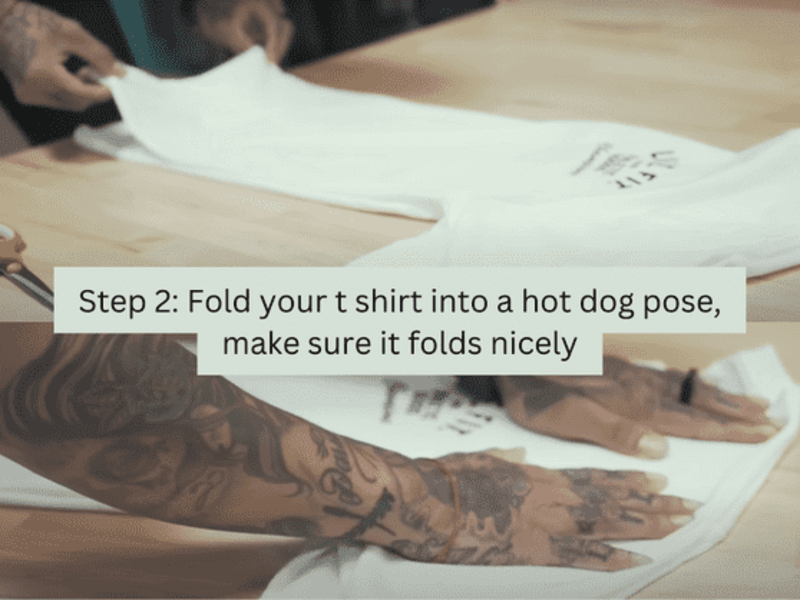
Fold your t-shirt into a “hot dog” pose.
Step 3: Mark the Cutting Lines
Now it’s time to mark the cutting spots! You have a couple of options:
- You can use your fingers to measure. Start from the collar, about 2-3 inches, and mark where you are about to cut the sleeves and neckline.
- To be more precise, you can use your favorite tank top as a guide. Lay the tank top over your folded t-shirt and trace around the armholes and neckline with a fabric marker or chalk.
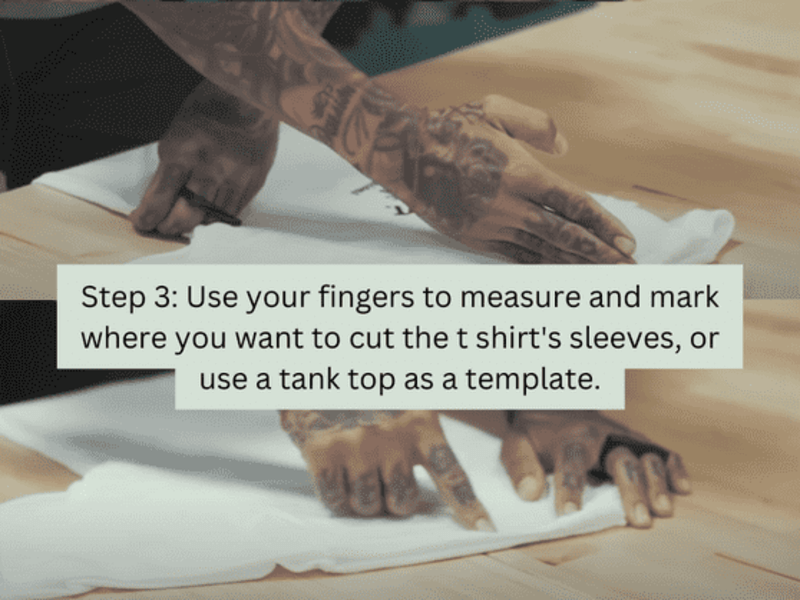
You can use your fingers to measure about 2-3 inches starting from the collar, or simply use a tank top as a template.
Step 4: Cut the Sleeves
Carefully cut along your marked lines to create a clean, finished look. Remember to cut just outside the seam where the sleeve joins the t-shirt’s body.
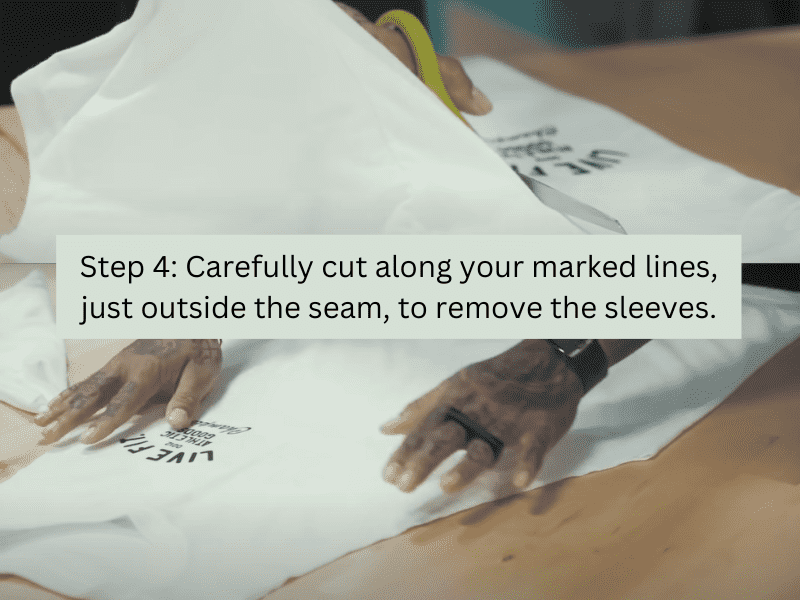
Now, carefully cut along those lines you marked to remove the sleeves. And no need to hurry – take your time and get it right!
Step 5: Adjust The Neckline (Optional)
Want to change the neckline? You can cut it deeper and create a V-neck or a crew neck. Start by drawing the neckline shape you want on your tank top using fabric marker or chalk. Then, carefully cut right along the line you’ve drawn.
Step 6: Try It On
Now, you are done. Make sure to wash your new tank top for a clean finish! A quick wash removes chalk and loose threads, so it’s fresh and ready to wear immediately.

After a few washes, all the edge lines will curve in, giving you a nicer look.
Method 2: The Racerback Style
This method is for a more sporty look. You’ll use the same basic materials and tools as in Method 1, but with a few more steps to achieve that classic racerback shape.
Step 1: Prepare the space according to method 1’s steps 1-3
Do the same as Methods 1 from Step 1 to Step 3 for complete t-shirt preparation. From step 2 of this method, the fun part starts.
You can use your classic tank top that fits you well as a visual guide; lay it on top of your t-shirt and trace around it with fabric chalk.
Step 2: Remove sleeves, collar, and hem, then modify armholes
After you are done preparing, we will now deepen the armholes, specifically on the back side of the t-shirt, to create the racerback effect. With the t-shirt flipped, you will cut through the back layer only.
For a typical racerback, you will cut in an inch or two deeper at the deepest point at the front armhole. Unfold and lay your t-shirt flat, right side out, and examine the new armhole shape.
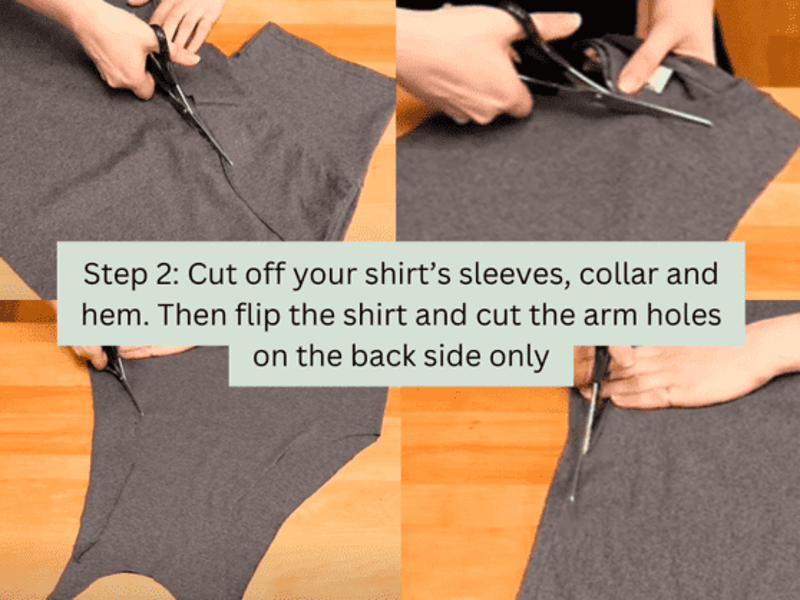
Now. You can see that the armholes are significantly deeper and more curved on the back compared to the front, giving you the signature racerback look.
Step 3: Cut the back neckline – back side only
Similar to how you deepened the armholes, you can now deepen the back neckline. Carefully cut a gentle curve from the existing back neckline edge, going slightly deeper into the back.
Usually, you can deepen the back neckline by about half an inch to an inch without making it too low. Again, be sure you are only cutting through the back layers.
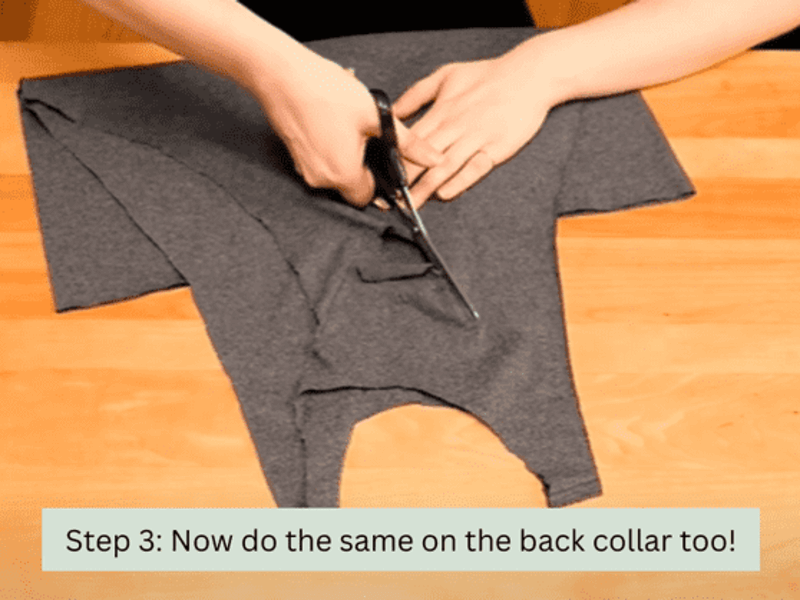
Now do the same on the back collar too!
Step 4: Finishing touches and wearing
It’s always recommended to wash your newly cut tank top before wearing it. This will help to remove any loose threads or fabric dust from the cutting process. Washing can also slightly soften the cut edges and help minimize fraying, especially if you used a knit fabric.
By following these more detailed steps, you should be able to create a racerback tank top with a more athletic and stylish appearance from an old t-shirt.
4 Essential Tips for a Flawless DIY Tank Top
Here are 4 essential tips to ensure your DIY tank top turns out perfectly from your T-shirt!
- Fabric choice is crucial for DIY tank top comfort. For the best result, begin with a soft, worn-in t-shirt—they’re naturally cozy and comfortable against the skin. Also, selecting a t-shirt one size larger than your usual size is a smart move, ensuring your finished tank isn’t too snug after cutting and reshaping.
- Sharp scissors: We recommend using sharp fabric scissors because they will help you achieve clean, precise cuts.
- Go slow: Remember to take your time when cutting because you can always trim more later if needed!
- Practice makes perfect: To avoid any oops moments on your best shirts, we suggest practicing on an old T-shirt first. It’s the easiest way to learn and get a feel for the process.

Key tips to ensure a successful DIY tank top transformation.
Common Issues You May Have When Turning Your T-shirt into Tank Tops And How To Avoid It?
Making your tank top can be fun, but it’s not always smooth sailing. You might encounter a few common issues while turning your t-shirts into tank tops and, most importantly, learn how to dodge those DIY disasters. Here are some typical hiccups and how to navigate them:
1. Stretched Fabric and Poor Fit (Especially Around Armholes & Neckline)
Knit fabrics, like most t-shirts, are stretchy by nature. As you cut, the edges might stretch out, which makes the shape look uneven and results in a poorly fitting tank top.
- Slight stretching: Sometimes, washing and drying the tank top (especially machine drying if the fabric can tolerate it – check the t-shirt’s care label) can help the knit fabric slightly shrink back and regain some shape.
- If your neckline or armholes get stretched out, you can fix them by adding a binding or hem. For a binding, you’d sew on a thin strip of fabric. With a hem, you’d fold the edge over and sew it down.
Either way, it adds structure and helps pull the stretched edge back into shape. This solution requires basic sewing or a sewing machine.
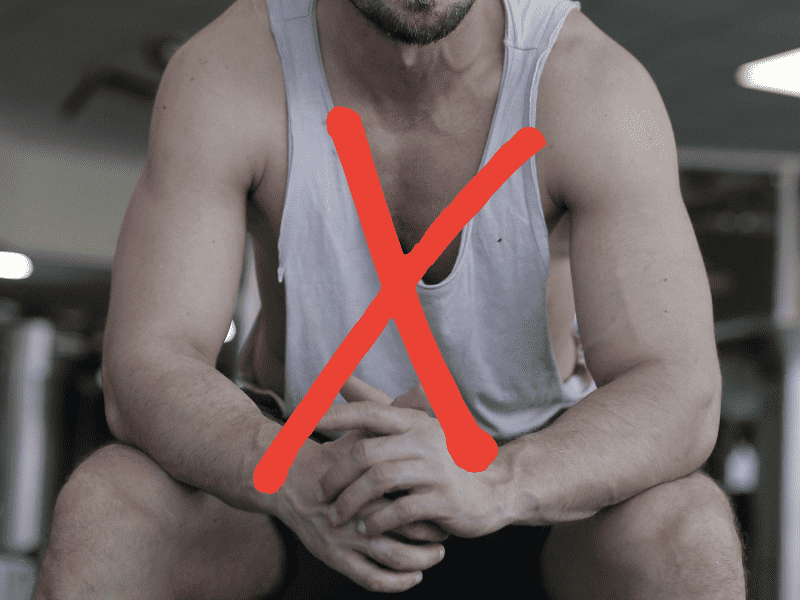
The softer and more loosely knit your t-shirt fabric is, the more stretchy the edges. So, just take extra care and cut gently, no matter what fabric you’re using.
2. Uneven Cuts (Wobbly Necklines, Armholes)
If you find cutting perfectly straight lines and smooth curves difficult, especially as a beginner, you’re not alone. It’s common to accidentally veer off track and get uneven or jagged edges.
How To Avoid It?
- If the unevenness is minor, you can carefully trim the longer sections to even things out. The good news is that minor unevenness in your cuts may become much less noticeable after you wash and wear your new tank top.
- For a neater, more finished edge, especially if you’re concerned about fabric fraying, you have a couple of options: you can use a serger, which is a type of sewing machine specifically for edges (sometimes called an overlock machine), or a zigzag stitch on your regular sewing machine. Either will give those raw edges a much cleaner look.
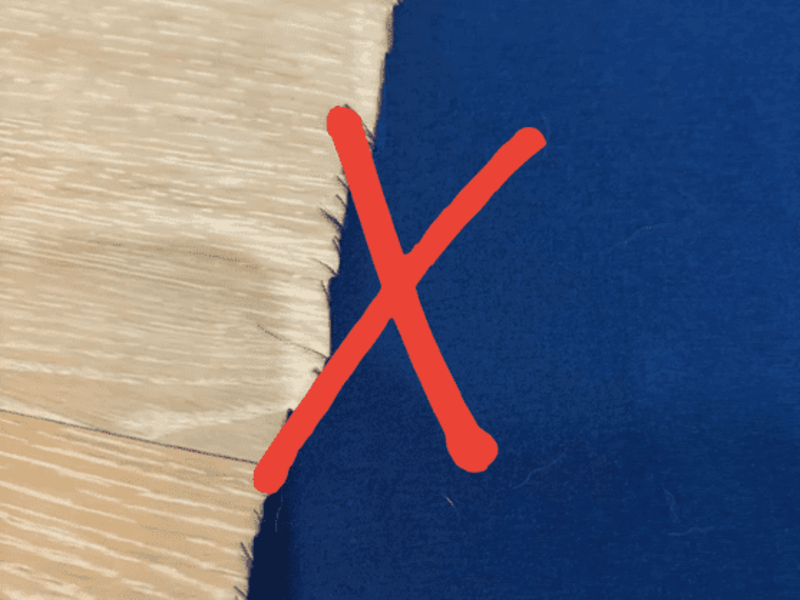
Uneven cuts are minor issues that beginners can easily encounter (Source: Reddit)
3. Armholes Too Small
Often, too-small armholes happen because you might not have removed enough fabric when cutting, or maybe your marked lines were too close to the original sleeve seams of the t-shirt.
How To Avoid It?
- Cut them wider: This is the direct solution! If the armholes are too small, simply carefully cut them wider.
- Try it on and recut: Look in the mirror and mark with fabric marker or pins how much wider you want to make the armholes. Focus on widening them away from your body, extending the curve outwards. Then, remove the tank top and carefully cut along your new, wider armhole markings. Again, cut a little at a time and test fit if needed.
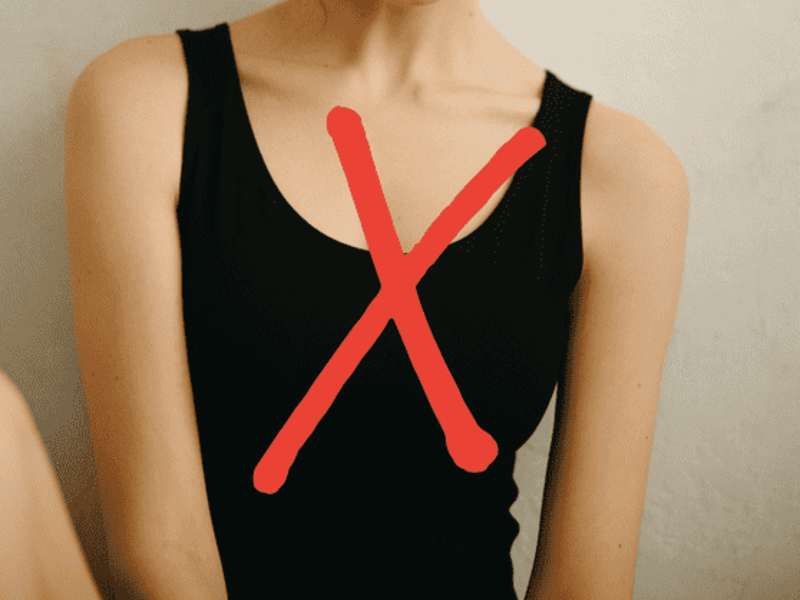
Small armholes can cause discomfort and limit movement (Source: Reddit)
4. Issue: Neckline Too Low
How To Avoid It?
Use a bandeau or lace bralette underneath: This is a stylish and easy fix! Layering a pretty bandeau top, lace bralette, or even a contrasting tank top underneath your DIY tank is a fashionable way to make a too-low neckline wearable. It becomes an intentional style choice.
Add a fabric insert or trim (more sewing): If you have some fabric scraps and basic sewing skills, consider adding a fabric insert or trim to raise the neckline slightly. Plus, you could sew on a decorative trim – like some pretty lace or a sporty ribbed knit – right along the neckline. It instantly makes it look more ‘finished’ and can lift the neckline slightly.
To help you create a tank top you love, we have put together some key tips. Make sure you check them out, they’re packed with helpful information!
Making a Perfect Tank Top: Key Tips for Success
Here are a few essential tips to ensure your DIY tank top turns out perfectly!
- Fabric choice: Start with a t-shirt that’s a bit larger than you normally wear, as cutting will make it slightly smaller. Comfort is king when it comes to tanks! Seriously, if you want that cool, relaxed tank top vibe right from the start, a soft, distressed t-shirt is always a fantastic choice. But if you prefer a new T-shirt, you can wear that as well!
- Sharp scissors: Using sharp fabric scissors will help you achieve clean, precise cuts.
- Slow down: Mistakes love speed. Careful cutting leads to tank top success, so take your time and let your scissors do the work at a relaxed pace.
- Practice makes perfect: If you’re nervous about cutting into your favorite tee, practice on an old t-shirt first to get comfortable with the process.
By understanding these common issues and using Yes T-Shirt’s tips, you will have more experience creating your own t-shirt or tank top with less frustration and more successful, stylish results.
FAQs
1. Does The T-Shirt Fray If I Cut It?
No, it doesn’t! T-shirt material does not fray. The edges may appear uneven, but this may be fixed by gently tugging them apart, forcing the fabric to curl inwards, giving you a cleaner appearance.
2. Are Tank Tops Supposed To Be Loose?
No, they are not! It shouldn’t be too tight or loose, and the armholes should let your arms move freely.
3. Can I Wear A Tank Top To The Beach?
Yes, you can wear a tank top on the beach. It is one of the most popular items for beach style – you’ll fit right in.
Wrapping up
That brings us to the end of this guide. We at Yes T-Shirt trust that this tutorial has given you the knowledge of how to turn t shirt into tank top. With these two methods, you will expand your wardrobe for various occasions, from summer getaways to gym sessions and sunny beach days.


